Showing posts with label christmas. Show all posts

Saturday, 28 December 2013

8 Easy & Affordable Ideas for Storing & Organizing Christmas Decor

I hope you all had a wonderful Christmas! I took a full week off to enjoy my family and it was so refreshing!
I am hoping to burn off some of those extra Christmas calories by putting away  our Christmas today and tomorrow, so I have rounded up some of the easiest and budget-friendly ideas for storing & organizing Christmas decorations. A few years ago, I instituted sorting  & storing my ornaments by colour and I love, love, love this method. It makes decorating a house so easy when you have things sorted by colour!

Ready for some great ideas now? Here we go:
Sort ornaments by colours in clear plastic boxes.

or sort & store ornaments by colour in bags.
organize your Christmas ornaments
Store Christmas Lights in Labeled Plastic Bags
Label greenery so you know where it goes each year.
Label Your Christmas Decorations
christmas wreath storage
Store Everything in Clear Containers

If you are looking for more great ideas, don't forget to visit these boards on Pinterest:
Organized Kitchens
Organized Homes

How about you? When do you usually pack up Christmas? Do you wait until the New Year or pack it up before?

Thank you so much for visiting!


This post is linked to:
Inspiration Monday, The DIY Showoff, Craft-O-Maniac,

Friday, 20 December 2013

Last Minute Pancake Mix Gift Idea

Our family loves homemade pancakes and they are so easy to make with just a few basic ingredients. The job of making pancakes takes just literally minutes...especially if things are pre-mixed and ready to go. Today I am sharing with you our BEST pancake recipe mix, that makes beautifully light & fluffy pancakes, and when the dry-ingredients are pre-mixed, it makes a fantastic gift when paired with a bottle of maple syrup or even a flavored butter.
Here is the recipe that our family has used for years and years. The recipe is tripled so it make a nice big bag of pancake mix for gift-giving.

Pancake Mix
{makes 3 batches of pancakes}

Ingredients:
4 1/2 cups flour
3 tbsp. white sugar
9 tbsp. baking powder
1 1/2 tsp. salt

To Make:
1. Sift ingredients together. Pour into a large bag.
2. With Pancake Mix, include directions to make 1 batch of pancakes as follows:
Measure 1 3/4 cups pancake mix into large bowl. In separate bowl, mix together 1 egg, 1 3/4 cup milk and 2 tbsp. vegetable oil. Make a well in center of dry ingredients and add milk & egg mixture. Stir gently until just mixed. Let batter rest for 1 minute. Using 1/2 cup measure, scoop batter onto hot griddle. Cook one side of pancakes until edges are slightly browned, then flip over and continue cooking until edges are browned. Serve with syrup. Makes 8 pancakes.
And I made the bag pretty by adding a chalkboard label and then I used red stickers for the title.
And the gift also looks super cute if you add a small spatula to the package too.
{I found the small Santa spatula at Target.}
And now you have a great gift for a family or friends. And it would make the most wonderful Christmas gift too!
And if you wanted, you could include this super wonderful Strawberry Butter too....it is heavenly on pancakes with syrup.
Wishing you a wonderful pancake breakfast!


This post is linked to:
The Party Bunch, Link Party Palooza,

Thursday, 19 December 2013

Last Minute Christmas Mug Cake Gift Idea

 I want to share with you a last minute gift idea which I made up for some girlfriends last night for Christmas. I love pretty packages, and when I saw these cute sweater-wrapped mugs at the dollar store, I couldn't help but pick up a few to make something pretty out of them! I thought they would be perfect for mug cake gift...and gift cards too! Who doesn't love some warm cake on a cold winter's night...especially when you can make it easily and quickly in the microwave and it tastes so good? And here's what's brilliant...the mug cakes are packages from a store too!
I decorated these lovely mugs with a sparkly snowflake tag and a wooden spoon tied with some twine. I even used some scrapbooking rub-on words to embellish the spoon with the words 'comfy' and 'cozy'.
And have you seen these in the cake mix aisle at Safeway? There are two flavors and I picked up some when they were on sale for $1 per box and there are 2 packages inside.
I also added some chocolates inside too. You could also add a gift card too. It sure does make a pretty gift, don't you think?
 And if you can't find any spoons, a mini candy cane embellishment will work as well and look just as festive!
This would be such a great gift for friends, neighbours, teachers and coaches.
And it doesn't take long to put together at all and is very easy on the budget!

And if you are looking for another idea for gift cards, visit HERE.
And if you are looking for an easy family gift, I have an idea for you HERE!
Thank you so much for visiting me!


This post is linked to:
The Party BunchLink Party Palooza,

Delicious Taco Dip

My husband has no words for this dip! It is so good that he just wants to eat it! The whole family loves this Taco Dip and it is not only a delicious appetizer but can also be a stand in for a casual supper when served with a salad. Made with hamburger and some other store bought ingredients, it takes about 20 minutes to put together before going into the oven for the final baking.
This dip has a delicious taco flavor, and you can also your favorite cheese and veggies to make it even better! And I have made the dip with Wholly Gaucamole salsa and guacamole because we love their fresh-tasting products!

Taco Dip
{Serves 8-10 as an Appetizer}

Ingredients:
1 lb. hamburger
2-3 green onions, sliced
2 teaspoons taco spice
1 teaspoon chili spice
2-3 cloves garlic, crushed
1 package of Wholly Guacamole Salsa
1 package of of Wholly Guacamole Guacamole
1-1/2 cups shredded cheese
1/2 cup diced tomatoes
Beanitos Chips for Serving

Directions:
1. In frying pan, fry hamburger, green onions, taco spice, chili spice and garlic until hamburger is brown and no pink is remaining.
2. Add salsa and guacamole to hamburger mixture and stir until completely mixed.
3. Add hambuger mixture to a large round oven-proof serving dish.
4. Sprinkle with cheese and diced tomatoes.
5. Bake in 350 oven until cheese is completely melted and dip is hot! Serve with chips!

And let me tell you about these fantastic Beanitos Chips. Beanitos chips are made of beans and they are wonderful with this dip. 
The Beanitos Chips not only taste great, but are GLUTEN FREE,  have protein and a great amount of fiber too!
They are an awesome alternative if you are eating gluten free or trying to reduce grains in your diet.
 Beanitos come in both in white chips and black chips and a few different flavors such as Sea Salt and Chipotle BBQ.
And they are wonderful to serve at Christmas time with dips for guests or family members who not able to eat gluten. Plus, they look so pretty too!

And don't forget this week that I am teaming up with some friends to bring you a fantastic collection of appetizer recipes for holiday entertaining, so don't forget to visit these lovely blogger for more amazing recipes! 


And here is the complete collection of recipes for Holiday Appetizers Week:


Thank you so much to Wholly Guacamole for providing me with Wholly Guacamole products and Beanitos Chips for purposed of review! We love the fresh taste of Wholly Guacamole and the new Beanitos Chips are awesome!


This post is linked to:
Inspire Me Please I'm Lovin ItInspiration GalleryThe Party BunchLink Party Palooza, Tatertots and Jello,

Wednesday, 18 December 2013

Easy Last Minute Gift Card Bag or Christmas Table Favor

If you have been following my blog for any length of time, you know that I adore pretty tables and things in small little bags. I am always looking for some little  favor to jazz up a place setting or make into a tiny gift. You might remember that I shared this Christmas Favor a few weeks ago, but I wanted to share a super easy idea for a gift card OR a table favor that you could make in just a few minutes with a few supplies and a glue gun. You know that a girl and her glue gun can do a lot in a few minutes!
These small gift bags were inspired by these sweet little red burlap bags that I was dying to do something pretty with and one of our favorite treats at Christmas...Ferrero Rocher chocolates. We all love Ferrero Rocher, so it seemed like an obvious choice to create a small gift using  this delightful chocolate treat.

Supplies:
Small red burlap bags (I got mine at Micheals)
Decorative picks with greenery & berries
Tags
Ferrero Rocher chocolates (3-4 per bag)
Glue gun
The How-To:
1. Fill bags with 3-4 chocolates (and gift card, if using) 
2.Close bag and tie on tag.
3.. Select small spring of greenery and a berry and attach to bag with glue gun.

That's it! You can also have some fun playing around...making each bag a little different. 
For this bag, I used some white frosted greenery.
And this project is very budget-friendly too, which is always a plus for our pocket books at this time of year!
And last year, I used Ferrero Rocher Chocolates to make favors bags for our New Years Eve party which you can see more of HERE.
Thank you so much for visiting me!
I hope you are getting to close to having all of your Christmas projects done!

Thank you so much to Ferrero Rocher Canada for providing the chocolates for this fun Christmas project! We love Ferrero Rocher Chocolates!


This post is linked to:
All Things Christmas Link Party,Inspire Me Please I'm Lovin ItInspiration Gallery, The Party BunchLink Party Palooza,

Tuesday, 17 December 2013

Cajun Potato Skins with Cheese, Bacon & Green Onion

It's Day 2 of Holiday Appetizers Week and I am back to share another finger food that we love! This one is great to serve during cold weather, and is it any surprise that our favorite appetizers tend to include bacon? Or sour cream?
This is our family's favorite appetizer...and it can also be a lunch or dinner too. You can add a salad. Or not.  It's fine on it's own.
And it's an appetizer that never fails to disappear in a crowd...it's that good!
This appetizer takes some time to create, but the extra time is so worth it!
I start by filling up the whole oven with potatoes for baking. I try to do this first thing in the morning so that the potatoes are baked and cooled well ahead of time. After they are cooled, they can go into the fridge until closer to serving time. Let's get to the recipe now, shall we?

Cajun Potato Skins with Cheese, Bacon & Green Onion

Ingredients:
Baking Potatoes
Olive oil
Cajun Spice
Shredded marble cheese
Bacon, chopped into bits
Green onions, sliced

Directions:
1. Bake potatoes in 400 oven until fork tender and skins are papery. {approx. 45-60 min}
2. Remove to a cookie sheet and let cool for a few minutes.
3. Slice warm potatoes lengthwise and let cool more.
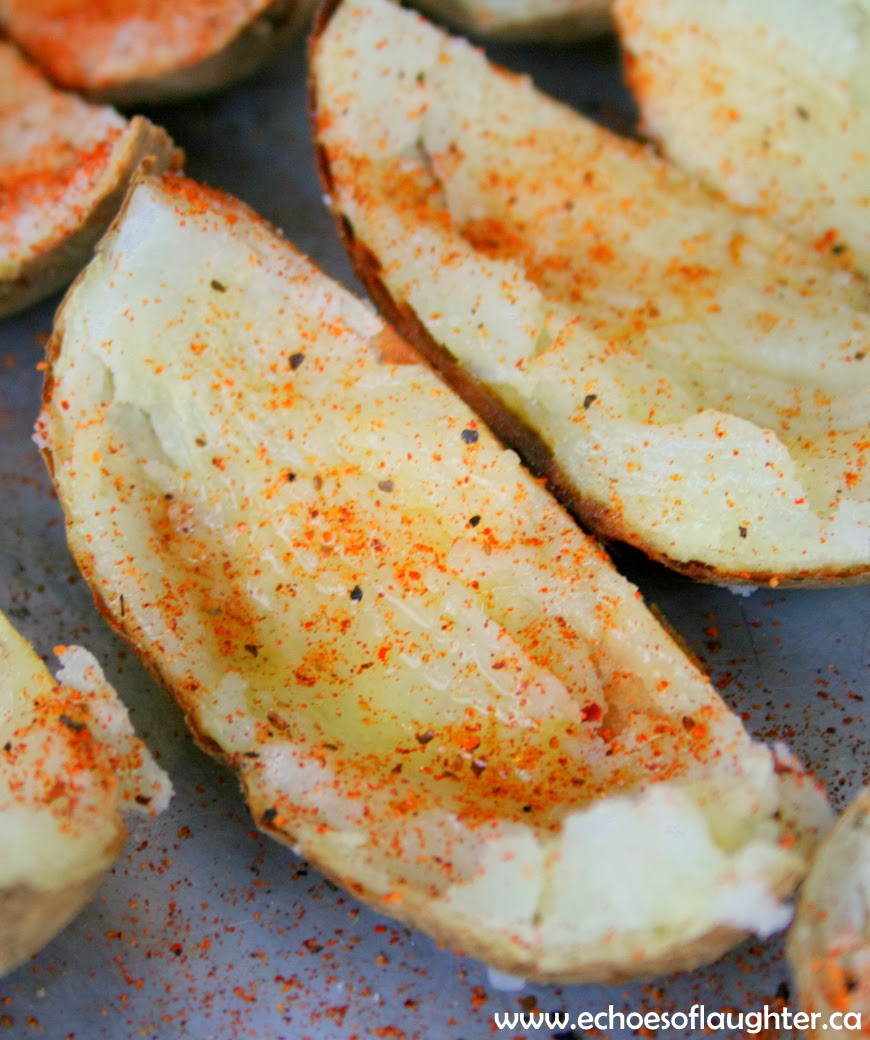
4. Using a spoon, scoop out potato flesh and then slice skins into wedges as shown.  Leave a little potato on each skin so the skin will hold the toppings.
5. Brush skins with olive oil and sprinkle with Cajun spice.
 6. Return skins to 400 oven and bake until skins are golden and crisp....20-25 minutes.
7. Remove skins from oven and sprinkle generously with cheese, bacon and green onions. Return to oven and bake until cheese melts...approx. 5-7 minutes. 
8. Remove from oven. Plate immediately and serve with sour cream.
Watch them disappear!

This is a great appetizer to serve with a chili and a salad, or steak and salad, or hamburgers.

And please don't forgot to click over and see what my blogging friends have been whipping up for Day 2 our #HolidayAppetizers Week!


Thank you so much for visiting! 
Drive safe on winter roads and stay warm!


This post is linked to:
 Gingersnap Crafts, Savvy Southern Style, The DIY Dreamer,Inspire Me Please I'm Lovin ItInspiration GalleryThe Party BunchLink Party Palooza,Tatertots and Jello,
that give mcdonalds coupons and 
breakfast coupons you also can find recipe from