Showing posts with label winter. Show all posts

Wednesday, 12 February 2014

Hot Chocolate in A Basket For Winter Fun Season

It's February and that brings a lot of winter activities for those of us who have snow at this time of year! A lot of small communities and cities play host to various winter and skating carnivals during this month...in addition to whatever outdoor fun your family enjoys such as skiing,skating or tobogganing. Years ago, when my daughter first started skating as a little 4 year old, there was one parent who brought a hot chocolate basket to the rink for all of us to enjoy. I so appreciated that warm cup of hot chocolate. Since it's right in the middle of the time for the best winter fun, I created this basket of hot chocolate yummy-ness that can be taken anywhere!
This basket is so simple and easy to throw together.  Just use a large size basket and add these things:

- a thermal carafe for hot chocolate
-Styrofoam cups or reusable to-go cups
-marshmallows
-crushed peppermint or candy canes
-Shelf Safe Milk
-whipped cream in a can
-napkins

And here are a few tips too. Fill the carafe with your favourite hot chocolate just before you leave home. It can also be filled with just hot water and different packages of hot chocolate mixes can be offered as well. I also like use to a carton of Shelf Safe Milk for this basket. It tastes great and it doesn't require refrigeration until it's opened. That means I can leave this basket in my car, just adding hot chocolate in a carafe and a can of whipped cream each time we go out. Shelf Milk has all of the same nutrition as conventional refrigerated milk, it's just pasteurized at a higher temperature. And the carton is designed to keep the milk safe from life and air.

As a busy mom, I always finding having some Shelf Safe Milk on hand is a great help for times when we are out of fresh milk. It's good to know that there is some in the pantry that can not only go into our hot chocolate basket, but also on cereal in the morning or be used to mix up those muffins for school lunches. Having Shelf Safe Milk has saved me more than a few times, and having a carton in our on-the-go hot chocolate basket is just the perfect ticket.I have also purchased cartons of Shelf Safe Milk to donate to the food bank because I just cannot imagine having children and not being able to buy them milk.

To learn more about shelf safe milk and tips for healthy, active families, visit Milk Unleashed and download the latest Cow Calendar.

Disclosure: I have partnered with Milk Unleashed to bring you this post. However, as always, I only work with those brand that I know and love and use in my own home.


Linking up with:
Tatertots and Jello, Link Party Palooza,Work It WednesdayStoneGableTweak It TuesdayWow Us WednesdayThe DIY Dreamer, Inspire Me Please, I'm Lovin' It,  Friday Kitchen Fun & Crafty Linky Party,  The Inspiration Gallery,  Party Bunch Linky Party Super Saturday Link PartyUnder  The Table & Dreaming,  It's Overflowing,  Block Party, Monday Funday,Time To Sparkle, 

Tuesday, 5 November 2013

Delicious One Pot Chili & Cooking With KitchenAid

It happened a few days ago...we woke up to a thin covering of snow...so it's safe to say that winter has arrived. That means that it's time to get out those cold weather recipes such as hearty soups, homemade chilies and pot roast dinners. I actually really like this time of year because I enjoy the simplicity of serving one pot meals to a hungry family when everyone returns to the nest at the end of cold day.

I have been so lucky this fall to be able to test and try out this beautiful enameled cast iron  KitchenAid 6 quart covered casserole dish from Canadian Tire. If you have never cooked with  enameled cast iron from Kitchen Aid, let me tell you about all of the things that I have discovered about cooking with this amazing covered casserole dish in the last 2 months. First, it browns meat wonderfully well.
Second, the pot works from the inside out to self baste whatever meat is cooking to keep it moist and tender.
Third, it has really comfortable, wide handles which are so important when taking a hot dish full of food in and out of the oven and to the table.
Fourth, it is stylish enough to go straight to the table for a family sit-down meal. AND, as you know, cast iron holds heat like a boss, so the dish stays hot for a long time!
And here's another plus....the cost of this lovely dish is really affordable when compared to other similar dishes made of cast iron. So you don't have to break the bank to invest in a fabulous piece of kitchen equipment that will last a lifetime!
Here's our family`s easy recipe for chili, which I made inside the casserole dish,  that is not too spicy or too full of beans, which makes it the perfect 'middle of the road' chili that most people can eat!
Easy One Pot Chili
(serves 6-8)

Ingredients:
1.5 pounds ground beef
1/2 cup diced onion
1 cup diced green pepper
1 cup diced red pepper
2 large cans diced tomatoes
1 large can tomato sauce
1.5 cups corn {frozen or canned}
1 can of kidney beans
1 can of beans in tomato sauce
3/4 cup chili powder {add more if you like}
1 tablespoon oregano

Directions:
1. In bottom of large casserole dish, brown ground beef with onion, green pepper and red pepper until meal is cooked thoroughly with no pink remaining. Add chili powder and oregano and stir well.
2. Add diced tomatoes, tomato sauce, corn, and beans. 
3. Stir to combine and simmer on medium heat for 30-40 minutes. Taste and adjust seasoning as desired. Serve with a green salad and rolls or bread.

One of the things that I couldn`t wait to try in my new KitchenAid casserole dish was Julia Child`s Beef Bourguignon recipe. My mother was visiting at the time and actually made the entire dish  and it was positively amazing! We served our beef with buttered noodles and  it was so, SO good.
There is nothing better than family gathering around a table with a great meal.
As a mom who cooks everyday, I have to say that I am thrilled to have the KitchenAid 6 quart covered casserole dish as part of my arsenal  of trusty and reliable kitchen equipment. I know that I can use this quality dish to create any one pot meal with terrific results and it will keep delicious food inside warm for a long time, which is really helpful for a busy family where often people eat at different times depending on their schedules!

Disclosure-I was so kindly provided with this dish by Canadian Tire and KitchenAid and I would like to thank both for the opportunity to test and review this product. (In fact, I asked for this dish!)  As always, I only work with products that I love and feel my readers would enjoy as well. All opinions are my honest opinions and I truly love this casserole dish! 

Linkin' up with:
Under The Table & Dreaming, Show Me What Ya Got, Tuesday Talent Show, Wow Me Wednesday, I Gotta Create, StoneGable,

Tuesday, 22 January 2013

January Blues Party...

Looking to chase away the January Blues?
A January Blues Party is a perfect little event to host to lift spirits in  a month of long, cold gray days.
I don't know about you, but January seems so long and many days are too cold to want to venture out anywhere.
Getting together with some girlfriends to chat & laugh is the best way I know to put some happiness into an otherwise bleak month.
I love my girlfriends!
 I put together this January Blues Party with white dishes and anything blue I could find, but really any theme would be just as fun!
{I think a Mexican dinner would be super dandy!}
I also added some sweet little yellow daffodils to play with the blues.
{Plus, they were $1.99 a bundle at the grocery store!} 
 I chose to use some grocery store desserts for this party..mini.cupcakes and mini powdered donuts.
And the lovely straws come from Greenmuch....my fav place for party supplies. 
And I made the sparkly tree globe with a mason jar, a sparkly white tree Christmas decoration, Epsom salts and some hot glue.
A pretty tablescape is always a nice treat.
 The menu was a homemade soup, salad & rolls. 
How about you?
Have you gotten together with girlfriends lately? 
 What are some of the things you do to chase away the January Blues?
I like nice hot baths, cozy socks and a TV series on DVD.
Lately I have been watching Vampire Diaries....which I blogger friend brought to my attention and lucky for me....3 seasons were already on my daughter's bookshelf!


If you liked this tablescape, you may like to check out my:

And these fun boards on Pinterest:


This post is linked to these great parties: Tip Junkie, Block Party,
The DIY Dreamer, Savvy Southern Style, Gingersnap Crafts, Lil Luna, Clean & Scentsible, Someday Crafts, StoneGable, Craftberry Bush, The Frugal Girls, Kitchen Fun With My 3 Sons, Tidy Mom,  The 36th Avenue, Between Naps on the Porch, Tatertots and Jello, It's Overflowing, Craft-O-Maniac, Aalderberry Hill, Uncommon Designs, I Heart Naptime, Under The Table & Dreaming,Home Stories A to Z, Today's Creative Blog, A Stroll Thru Life, Cozy Little House, Chef-in-Training, Kitchen Fun With My 3 Sons, Skip To My Lou, Inspire Me Please,

Friday, 30 November 2012

Kids Project: Easy & Fun Snowman Cookie...

 Where I live, it's winter for about 5 months of the year. Not kidding! It's not like that everywhere in Canada...I just happen to live in Canada's largest northern city.We have had a snowstorm in every month of the year...except for July! This year, we have had a full blanket of snow since the middle of October. Everything outside is freakin' frozen! We try to embrace winter with lots of fun winter activities and in my city, we are lucky enough to have over 12 outdoor rinks...in addition to indoor rinks. To celebrate winter....I created this fun snowman project as a fun activity for kids.
 
This is an easy project that can be created with a can of refrigerated cinnamon buns, so it's perfect for busy moms with crazy schedules during this holiday season. 
 

For this project you will need:
-A can of refrigerated cinnamon buns {You will need 2 buns per snowman.}
-white frosting
-pretzel sticks for arms
-candies & sprinkles for decorating the snowman to make buttons and eyes
-sour straps candy to make the scarf

Directions:

1. Use one cinnamon bun to make the bottom snowball for the snowman.

2. Take a second cinnamon bun and cut the outer ring of the bun off. Use this piece to make the head for the snowman. Let your child roll this into a ball for a head. Use the remaining piece of the bun to make the middle snowball for the snowman. Let your child assemble the snowman on a cookie sheet as shown.

 
3. Bake snowman as directed on the can of cinnamon buns. Let cool slightly.

4. Give your child the white frosting, a small spreader, pretzels, sprinkles and candies for decorating his/her snowman however they wish!

5. Eat and enjoy!


 Do you have snow in your neck of the woods? {I know without even asking that most of you don't!}


This post is linked to these great parties:
Tatertots and Jello, Under The Table & Dreaming, Craft-O-Maniac, Homestories A to Z,
Today's Creative Blog, Chef in Training, Inside Bru Crew Life, 33 Shades of GreenSavy Southern Style, Gingersnap Crafts, Lil Luna, Clean & Scentsible, The DIY Dreamer, It's Overflowing, I Heart Naptime, Not Just A Housewife, Tidy Mom, Project Inspire, Somewhat Simple, The Frugal Girls,

Ask Anna

Monday, 29 October 2012

Getting Ready For Cold & Flu Season...

Today I want to share with you a seasonal organizing project which is especially important for this time of year...cold & flu organizing. Let's face it...there is nothing worse than needing fever medicine for a sick child at 3 am and discovering that the bottle is almost empty. It's happened to me before and I've been left driving around town in my pajamas and bad hair looking for the 24 hour drug store. Surely not a fun chore to do at 3 am, so I got my act together and I have been organized and ready for the cold & flu season for the past few years.

Now is the perfect time to go through the medicine cabinet or cupboard to take stock of the cold & flu supplies to make a list of things needing replacing/replenishing  for winter. I would suggest gathering everything together and checking 'best before' dates and discarding those medicines which have expired.   Now you are ready to make a list of items you need to pick on the next trip to the store.

One thing that I like to use to organize our cold & flu supplies is a handy dandy carry-all. I found this one at the dollar store and I love it because it holds everything that might be needed for a sick patient and is easy to carry to whichever room its needed. Or, when you have more than one family member sick, it's great for running from room to room without losing your mind! I call our handy carry-all "The Nurse".


"The Nurse" is stocked with:
  • Fever medicine. Liquid medicine for my youngest child and tablets for everyone else.
  • Gravol. Both liquid and tablets.
  • Vicks Vapor Rub
  • Sinus/Decongestents
  • Thermometer
  • Tea
  • Honey Sticks
  • Throat Lozenges
  • Tissues
  • small pad of paper and pen for recording doses of medicine and times given {because when you are sleep-deprived, it can be hard to remember,}

The only thing not in "The Nurse" is ginger ale, Gatorade, saltine crackers, chicken noodle soup and popsicles. I used to buy a case of ginger ale for the winter, but this past summer we got a Soda Stream and I love it because we can make ginger ale anytime that it is needed. I have stocked up with a couple of boxes of saltine crackers and a case of chicken noodle soup. If you have little children in the house, a supply of Pedialyte would be a good thing to have as well.

This organizing project should take no more than 15 minutes {not include shopping time}, but you will be so happy with yourself for being prepared for whatever comes your way this fall & winter.There will be no driving around town in pajamas and bad hair at 3 am...which is always a good thing!

{This post was written for a guest post for I'm An Organizing Junkie and was shared there last week.}


This post is linked to: Tuesday Talent Show, Home Stories A to Z, DIY Dreamer, Clean & Scentsible, Uncommon, Homemade Ginger, Lil Luna Savy Southern Style, Gingersnap Crafts,
Positively Splendid, I Heart NaptimeCraft O Maniac MondaySomething I Whipped Up,
Today's Creative Blog, Stone Gable, Tidy Mom, Craftberry Bush, Tatertots and Jello, Six Sisters' Stuff,

Friday, 6 January 2012

Winter Decor......

My kids have been home on Christmas vacation this week, so when I am not busy with them, I have been putting away Christmas and freshening up vignettes around the house and front door.
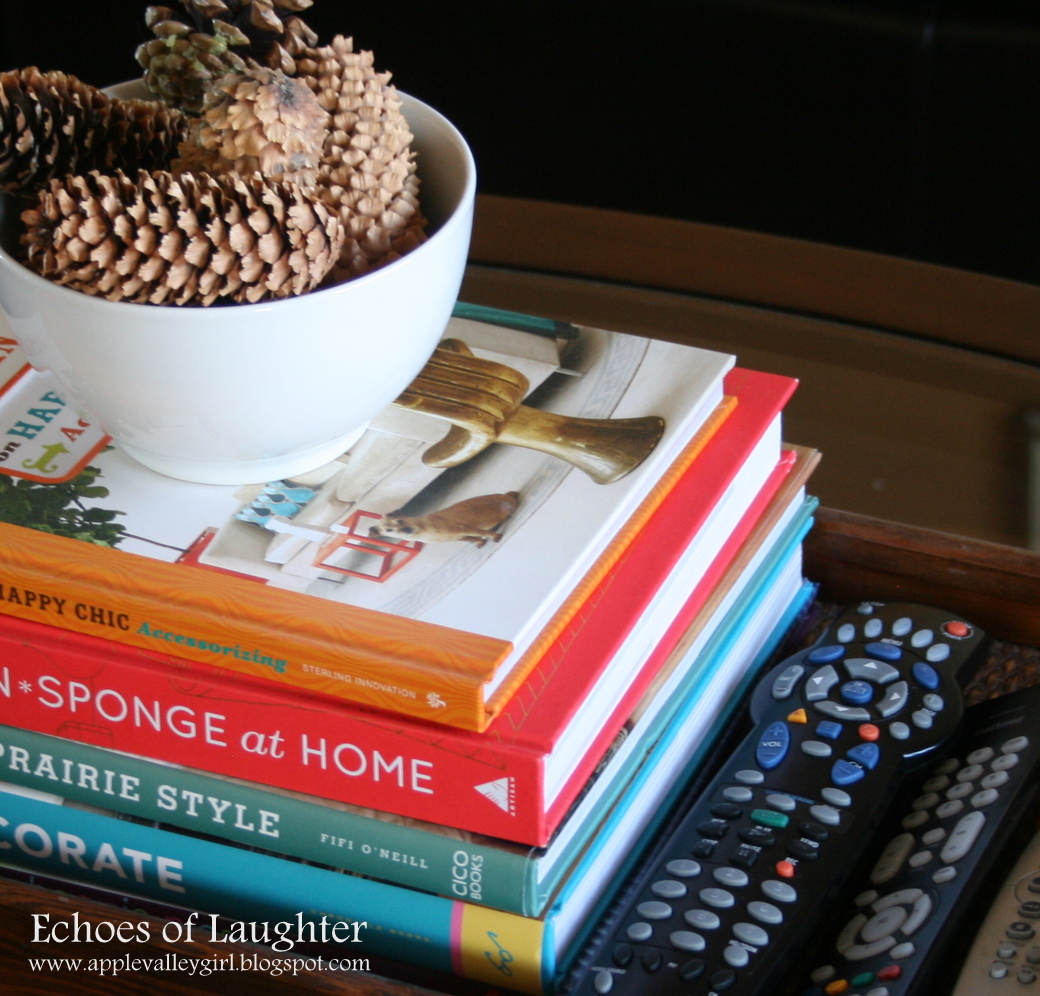
 Just replacing the reds & greens with greenery and pine cones...
 Very simple...but I love playing with my house!
 I could not put Mr. Owl away....I just love him too much!
 I adore books in any room,..in any home.
 Some of the new decor books I got for Christmas...
 Beautiful bright sunshine in the middle of the day....
I hope you all have had a wonderful week!
I hope to get back to more of a regular blogging schedule next week.
And I have some fun things to share!
xo


This post is linked to these great parties:


Thirty Hand Made Days


Thursday, 1 December 2011

A Hot Chocolate Bar for the Kiddos...

I decided to do something entirely different with the top of this cabinet this holiday season.
Instead of decorating this surface for Christmas, I thought the kids might appreciate a
'Hot Chocolate' bar for the winter.
They both love hot chocolate during our cold winters....especially before and after school.
This is such a simple project to create....I just grabbed some mason jars, made a few labels at avery.com, and filled the jars with hot chocolate, marshmallows, and mini candy canes.
I used a dollar store table cloth that I cut to size to fit the top of the table top for easy wiping & clean up.
I do have lots of pretty apothecary jars that I could have used, but that doesn't  make it kid friendly as I am sure that I would hear an occasional smash as a top would get dropped or accidentally knocked on the floor. Therefore, mason jars with wide, metal lids are the best choice for my 10 year old & his friends.
Afterall, I do want it to function well besides being pretty.
If this was for a one time party or for adults only, I probably would use apothecary jars dressed up.
But this for my sweeties!
Now the kids can help themselves whenever they like...and play hostess to their friends.
 And look what arrived in the mail this week....homemade-treats-made-by-Grammie-and-taste-tested-by-Grampie....and mailed 3000 miles across the country.
Perfect with a mug of hot chocolate!
We are so lucky!
Thank you Grammie & Grampie!


This post is linked to these terrific parties:


The 36th Avenue

 Creating Christmas at The Girl Creative

Design Dazzle


Home Stories A2Z


The Lettered Cottage


UndertheTableandDreaming


Link Party


Thirty Hand Made Days


that give mcdonalds coupons and 
breakfast coupons you also can find recipe from